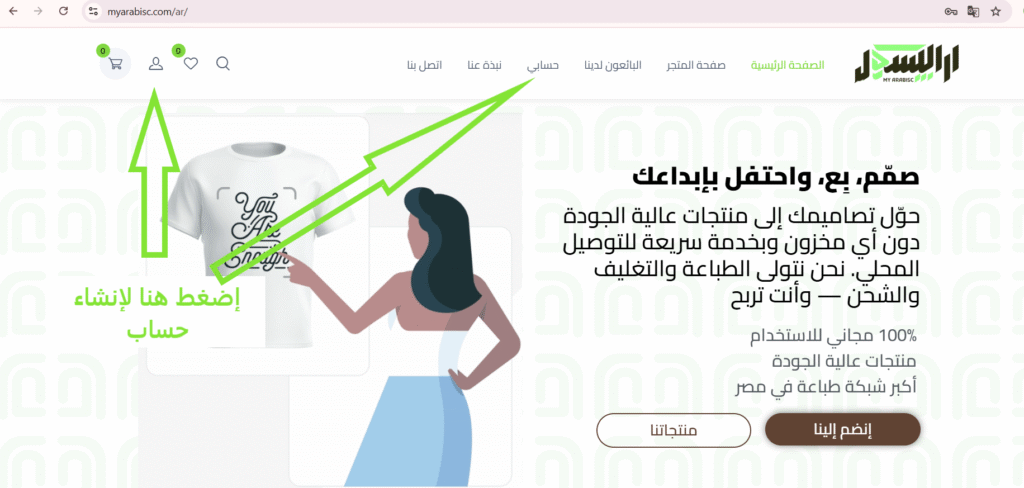
If you don’t have an account yet, choose the Create Account tab in the popup window. If you already have an account, simply log in.cash so they can find the financial freedom they deserve.
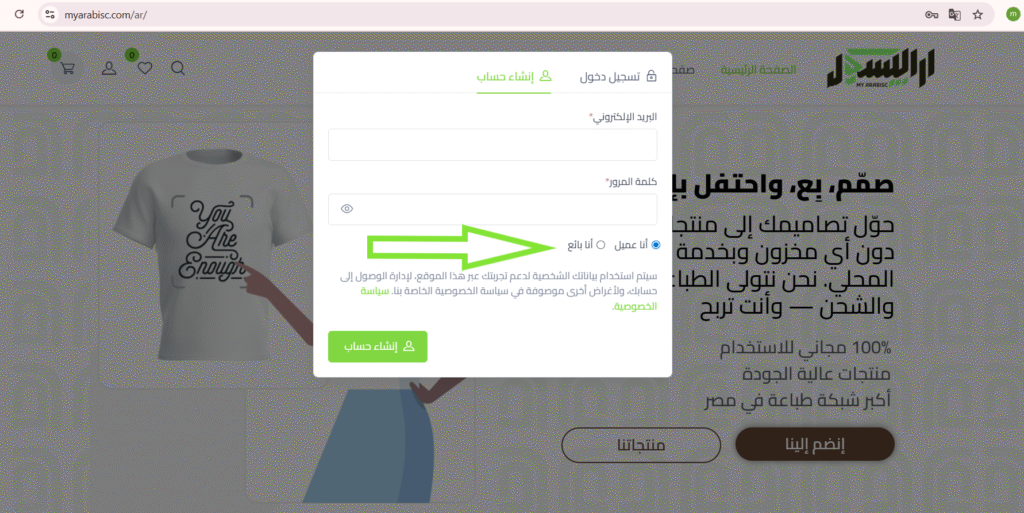
3. Select Account Type
To start selling and uploading your designs, select I am a Vendor instead of “I am a Customer,” then continue filling in your details.
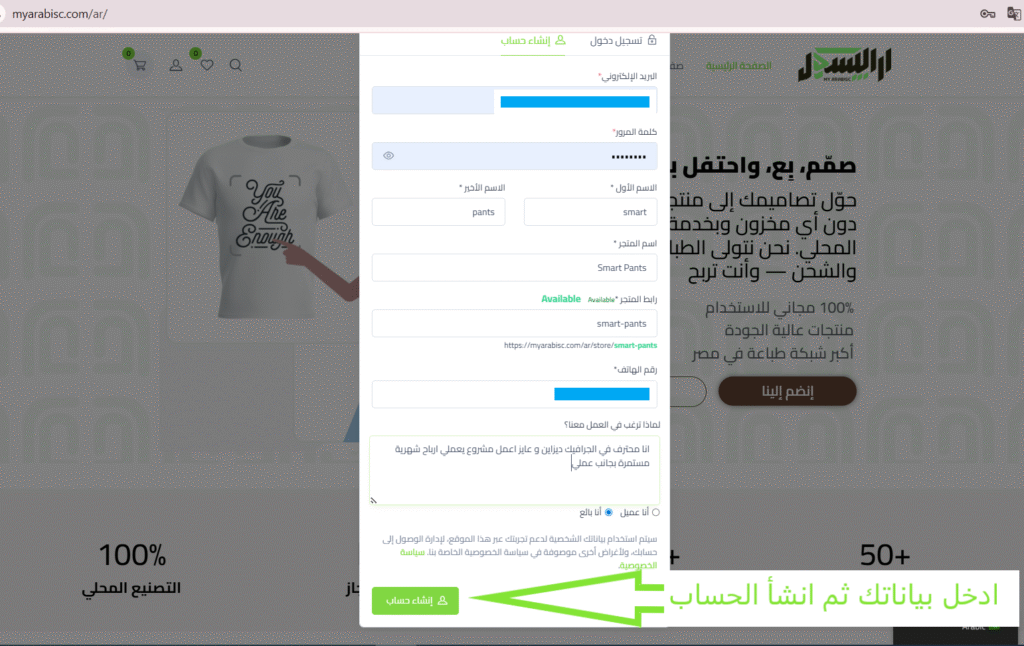
4. Complete Your Details & Register
Fill in your email, password, store name, store URL, and phone number. Then click Create Account. Add a short description about yourself in the “Why do you want to work with us?” field.
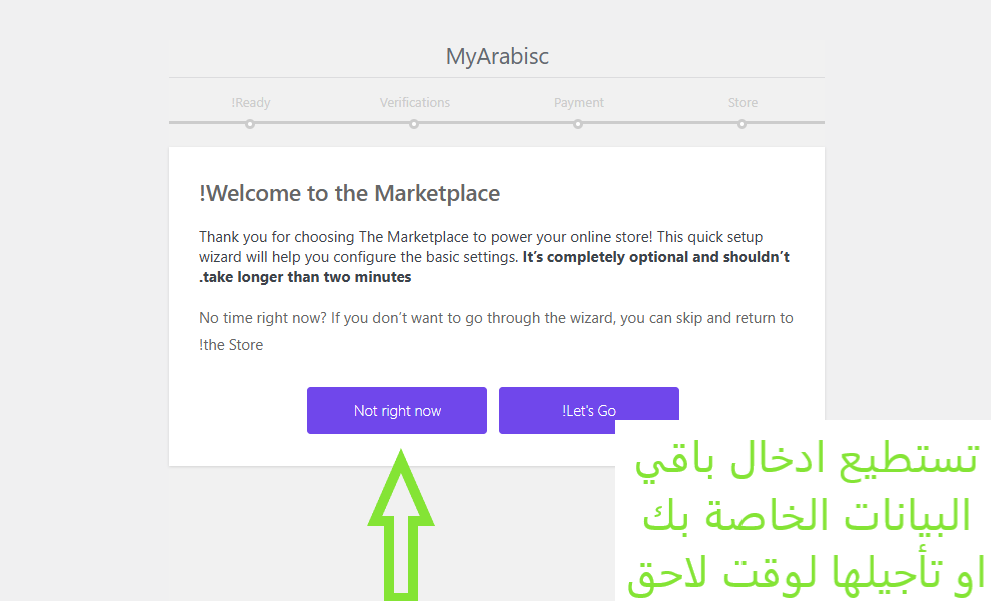
5. Initial Setup (Optional)
A quick setup wizard will appear. You can complete it now or click Not Right Now to skip and finish later from your dashboard.
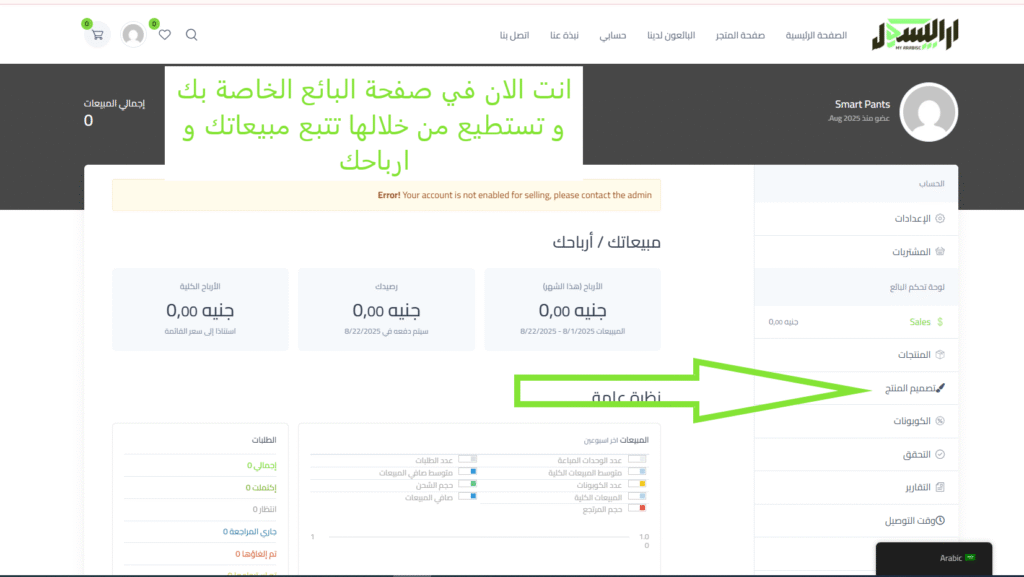
6. Vendor Dashboard
This is your personal vendor dashboard to track sales and earnings. To start, go to Product Design from the side menu. (If you see a message saying your account is not yet enabled, it means the admin still needs to approve it.)
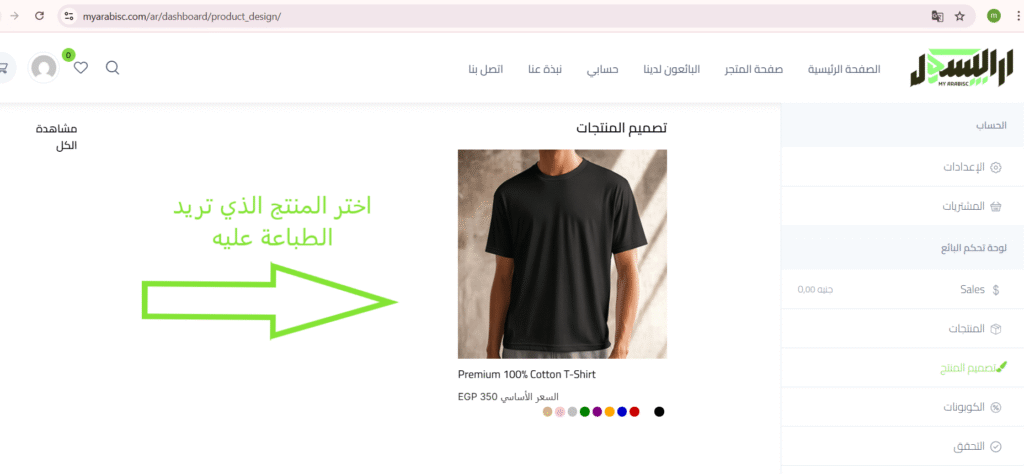
7. Choose Your Product
From the Product Design page, select the T-shirt you want to print your design on.
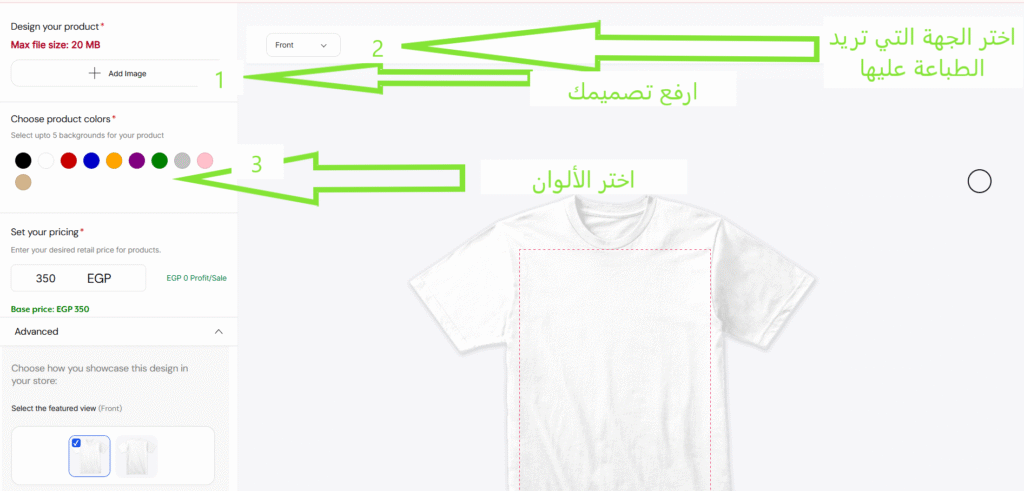
8. Upload Your Design & Set Options
Choose the side (front/back), upload your design file (preferably high-resolution PNG with transparent background), and select up to 5 product colors.
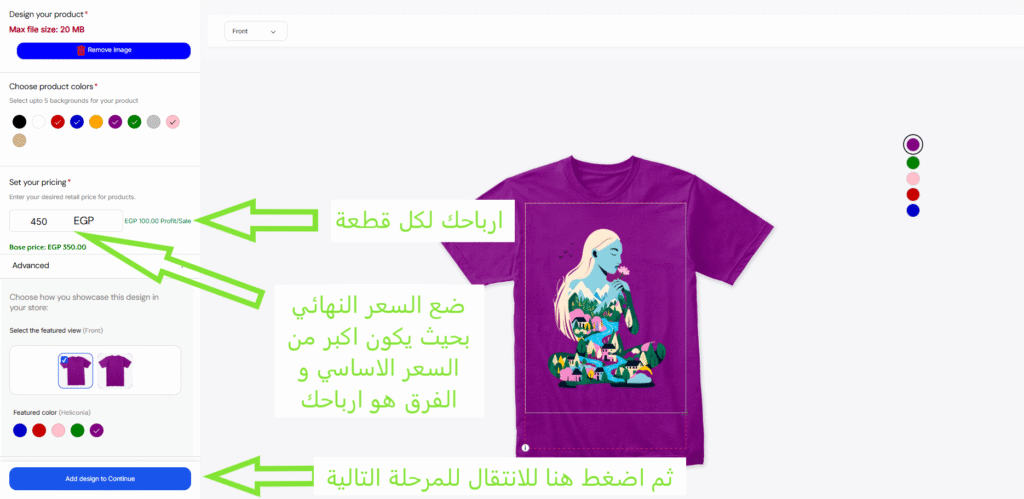
9. Set Price & Profit
Enter your final selling price. Make sure it’s higher than the base price shown. The difference will be your profit per sale. Then click Continue to move to the next step.
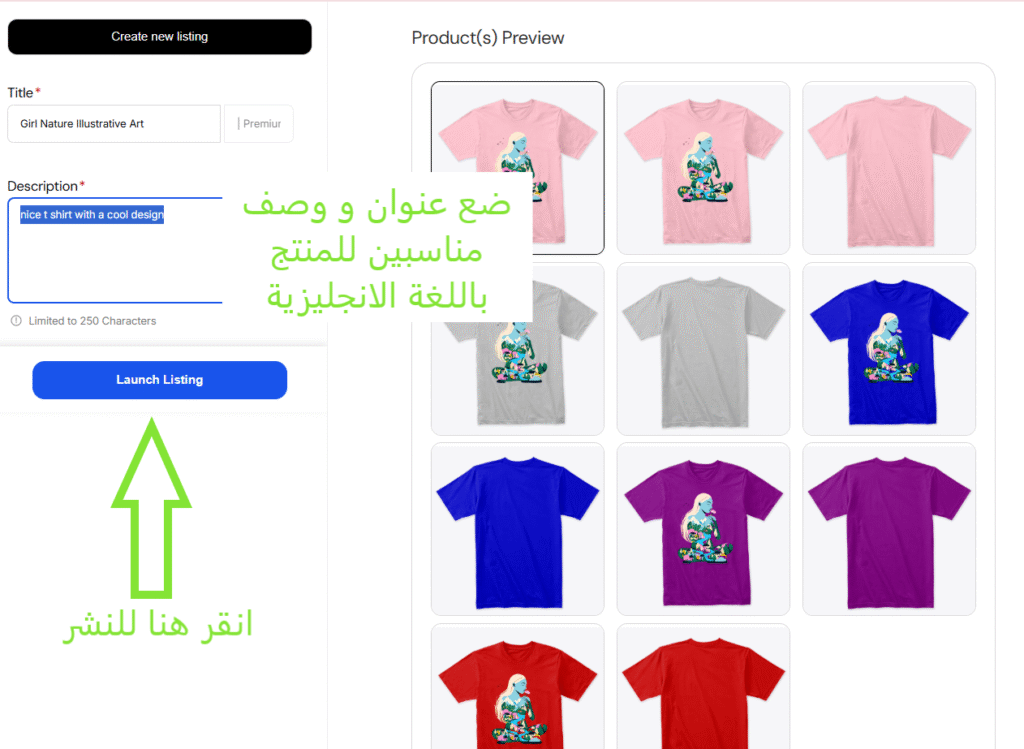
10. Add Title & Description
Write a clear product title and a short description (in English) for your T-shirt. Review the generated mockups for all selected colors, then click Launch Listing to publish.
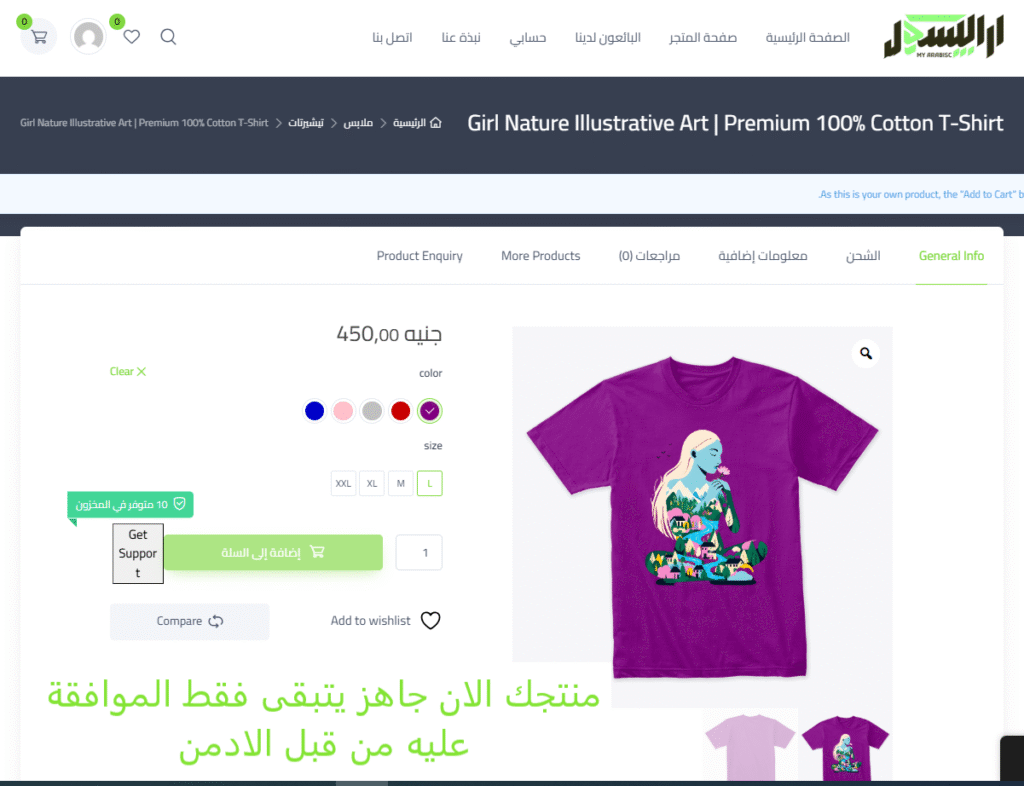
11. Product Approval
Your product is now ready in the system. The final step is admin approval before it appears on the marketplace for customers to buy.